What are the Best Practices for DTF Transfer Application
Matt Hayes
0 comments
This guide covers the most important DTF transfer application best practices for achieving professional-quality results.
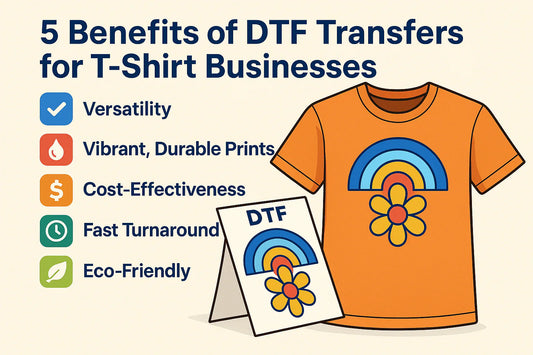
DTF (Direct-to-Film) transfers are very popular. For successful DTF transfer application, they offer vibrant colors and excellent durability. They are compatible with many fabrics. However, a high-quality transfer can disappoint. This happens if it is not applied correctly.
Are you creating shirts for personal use? Are you fulfilling customer orders, or running a print shop? Proper DTF application improves print quality. It also enhances adhesion and wash durability. This guide covers best practices. We will discuss common mistakes here. Tips for professional results are also included.
For more information about the commercial printing and garment decoration industry, resources from PRINTING United Alliance provide valuable educational materials.
Key Takeaways
✅ Pre-press garments for 2–5 seconds before applying transfers
✅ Remove lint, dust, and moisture before pressing
✅ Use the correct temperature, pressure, and press time
✅ Follow the recommended peel method (hot, warm, or cold)
✅ Perform a final press for maximum durability
✅ Wait at least 24 hours before the first wash
Why Proper DTF Application Matters
Many transfer failures are not caused by the transfer itself but by improper application. Incorrect temperature, insufficient pressure, moisture in the garment, or poor positioning can lead to peeling, lifting, cracking, or faded results.
Following proven DTF transfer application best practices helps ensure:
Better adhesion
Brighter colors
Improved durability
Consistent production quality
Higher customer satisfaction
A few extra minutes spent preparing and pressing correctly can save hours of rework later.
Step 1: Prepare the Garment Properly
Proper garment preparation is one of the most important parts of successful DTF transfer application. Preparation is one of the most overlooked parts of the DTF process.
Before applying your transfer:
Remove lint using a lint roller
Ensure the garment is clean
Lay the garment flat
Eliminate wrinkles
Remove moisture with a quick pre-press
A pre-press of 2–5 seconds helps eliminate moisture trapped inside the fabric and creates a smooth pressing surface. This simple step often improves adhesion and reduces future peeling issues.
Step 2: Position the Transfer Correctly
Even a perfectly printed transfer can look unprofessional if it is placed incorrectly.
Take time to properly align the transfer before pressing. Consider the garment style, transfer size, and intended placement.
Common placements include:
Left Chest
Full Front
Full Back
Sleeve
Hat Placement
Proper placement improves the overall appearance of the finished garment and helps create a professional result.
Step 3: Use the Correct Heat Press Settings
Heat press settings play a critical role in transfer performance. Correct temperature, pressure, and timing are essential for consistent DTF transfer application results.
While exact settings may vary by manufacturer, most premium DTF transfers are applied within the following range:
Setting
Typical Range
Temperature
290°F–310°F
Press Time
7–10 Seconds
Pressure
Medium
Low temperatures may result in poor adhesion. Excessive heat can damage the transfer. It can also damage the garment.
For detailed recommendations, link to your DTF Heat Press Settings Guide here.
Heat transfer professionals often recommend following manufacturer specifications and proven application methods, such as those shared by Stahls'.
Step 4: Peel the Film Correctly
Not all DTF transfers use the same peel method.
Some transfers are:
Hot Peel
The carrier film is removed immediately after pressing.
Warm Peel
The transfer should cool briefly before peeling.
Cold Peel
The transfer must cool completely before removing the carrier.
Always follow the peel instructions provided by your transfer supplier. Peeling too early or too aggressively can cause portions of the design to lift.
Step 5: Perform a Final Press
Many experienced decorators perform a second press after removing the carrier film.
This final press typically lasts 3–5 seconds and is done using parchment paper, kraft paper, or a finishing sheet.
Benefits include:
Improved durability
Softer hand feel
Better adhesion
Enhanced wash resistance
Although optional, a final press is considered a best practice by many professional apparel decorators.
Common DTF Application Mistakes
Many transfer problems can be traced back to simple application errors.
Avoid these common mistakes:
Skipping the Pre-Press
Moisture trapped in fabric can prevent proper adhesion.
Using Incorrect Temperature
Improper heat settings can lead to lifting, cracking, or poor durability.
Applying Uneven Pressure
Consistent pressure is essential for uniform adhesion.
Peeling Too Early
Removing the carrier before the adhesive has properly bonded may damage the transfer.
Ignoring Garment Preparation
Lint, dust, and wrinkles can negatively affect the final result.
Using the Wrong Transfer Size
An oversized or undersized design can make the finished garment look unbalanced.
Troubleshooting Common DTF Problems
Why Is My DTF Transfer Peeling?
Many common problems can be traced back to improper DTF transfer application techniques. Common causes include:
Insufficient pressure
Low temperature
Moisture in the garment
Incorrect peel timing
Why Is My Transfer Cracking?
Cracking may result from:
Under-pressing
Poor-quality transfers
Excessive stretching
Incorrect wash care
Why Does My Transfer Look Dull?
Dull colors may be caused by:
Low-quality artwork
Incorrect press settings
Poor transfer quality
Why Is My Design Lifting After Washing?
This often indicates inadequate adhesion during the original application process.
Recommended care instructions:
Wait at least 24 hours before washing
Turn garments inside out
Wash with cold water
Use mild detergent
Avoid bleach and fabric softeners
Tumble dry on low heat or hang dry
Do not iron directly on the design
Washing and Care Best Practices
Proper care helps maximize transfer longevity.
Recommended care instructions:
Following these guidelines helps preserve color vibrancy and adhesion for many washes.
Industry organizations such as AATCC publish textile testing and garment care standards used throughout the apparel industry.
Heat Press vs Household Iron
Many beginners wonder whether a household iron can be used instead of a heat press.
While an iron may work for some simple projects, a heat press provides:
Consistent temperature
Even pressure
Better durability
More reliable results
If you're applying custom heat transfers or custom iron-on transfers regularly, investing in a heat press is usually worthwhile.
For occasional hobby projects, traditional iron on transfer paper may still be a suitable option. However, professional-quality heat transfers for shirts generally perform best when applied with a heat press.
Where to Order Ready-to-Press DTF Transfers
If you want professional results without investing in expensive printing equipment, ordering ready-to-press transfers can be a simple solution.
{"layoutMobile":2,"layoutDesktop":3,"buttonAlign":"Center","buttonText":"Buy now","productTitle":{"hue":213,"brightness":0.83,"saturation":1},"priceColor":{"hue":0,"saturation":1,"brightness":0},"discountPrice":{"hue":356,"saturation":0.74,"brightness":1},"buttonColor":{"hue":213,"brightness":0.83,"saturation":1},"textBottomColor":{"hue":0,"saturation":0,"brightness":1},"activeTitleButton":true,"moreProduct":"View all","moreProductUrl":"samsdtftransfers.com","rowNumber":1,"dynamicProductId":[{"id":"gid://shopify/Product/7714121089179","title":"DTF Transfers By Size","handle":"dtf-transfers-by-size","currencyCode":"USD","amountMax":"13.0","amountMin":"0.9","price":"0.90","compareAtPrice":"1.00","imagesUrl":"https://cdn.shopify.com/s/files/1/0314/2375/8471/files/dtf-transfers-by-size-pp.webp?v=1748860590&width=600","additionalImages":["https://cdn.shopify.com/s/files/1/0314/2375/8471/files/Custom-By-Size-DTF-Transfers-in-Texas-Dallas.webp?v=1748860590&width=600","https://cdn.shopify.com/s/files/1/0314/2375/8471/files/Custom_By_Size_DTF_Transfers_Size_Guide_Table.webp?v=1748860590&width=600","https://cdn.shopify.com/s/files/1/0314/2375/8471/files/Custom_By_Size_DTF_Transfers_Size_Size_10_5_x_10x5_Width.webp?v=1748860590&width=600","https://cdn.shopify.com/s/files/1/0314/2375/8471/files/Custom_By_Size_DTF_Transfers_Size_9_x_9_Width.webp?v=1748860590&width=600","https://cdn.shopify.com/s/files/1/0314/2375/8471/files/Custom_By_Size_DTF_Transfers_Size_13_Width.webp?v=1748860590&width=600","https://cdn.shopify.com/s/files/1/0314/2375/8471/files/Custom_By_Size_DTF_Transfers_Size_12_x_12_Width.webp?v=1748860590&width=600","https://cdn.shopify.com/s/files/1/0314/2375/8471/files/Custom_By_Size_DTF_Transfers_Size_8_x_8_Width.webp?v=1748860590&width=600","https://cdn.shopify.com/s/files/1/0314/2375/8471/files/Custom_By_Size_DTF_Transfers_Size_6_x_6_Width.webp?v=1748860590&width=600","https://cdn.shopify.com/s/files/1/0314/2375/8471/files/Custom_By_Size_DTF_Transfers_Size_10_x10_Width.webp?v=1748860590&width=600"],"urlStore":"/products/dtf-transfers-by-size","altImage":""},{"id":"gid://shopify/Product/8522199564443","title":"New DTF Gang Sheet Builder","handle":"build-dtf-gang-sheet","currencyCode":"USD","amountMax":"88.8","amountMin":"6.6","price":"6.60","compareAtPrice":"8.19","imagesUrl":"https://cdn.shopify.com/s/files/1/0314/2375/8471/files/Build-Your-Gang-Sheet-DTF-Transfers-in-Texas-Dallas.webp?v=1750077699&width=600","additionalImages":["https://cdn.shopify.com/s/files/1/0314/2375/8471/files/Home-Products-Image-GangSheetBuilder-Min.jpg?v=1750077699&width=600","https://cdn.shopify.com/s/files/1/0314/2375/8471/files/DTF-Gang-Sheet-Builder-Order-Free-12-x-22-Inches.png?v=1750077699&width=600","https://cdn.shopify.com/s/files/1/0314/2375/8471/files/DTF-Gang-Sheet-Builder-Order-Free-120-x-22-Inches.png?v=1750077699&width=600","https://cdn.shopify.com/s/files/1/0314/2375/8471/files/DTF-Gang-Sheet-Builder-Order-Free-140-x-22-Inches.png?v=1750077699&width=600","https://cdn.shopify.com/s/files/1/0314/2375/8471/files/DTF-Gang-Sheet-Builder-Order-Free-160-x-22-Inches.png?v=1750077699&width=600","https://cdn.shopify.com/s/files/1/0314/2375/8471/files/DTF-Gang-Sheet-Builder-Order-Free-180-x-22-Inches.png?v=1750077699&width=600","https://cdn.shopify.com/s/files/1/0314/2375/8471/files/DTF-Gang-Sheet-Builder-Order-Free-20-x-22-Inches.png?v=1750077699&width=600","https://cdn.shopify.com/s/files/1/0314/2375/8471/files/DTF-Gang-Sheet-Builder-Order-Free-200-x-22-Inches.png?v=1750077699&width=600","https://cdn.shopify.com/s/files/1/0314/2375/8471/files/DTF-Gang-Sheet-Builder-Order-Free-240-x-22-Inches.png?v=1750077699&width=600"],"urlStore":"/products/build-dtf-gang-sheet","altImage":"Custom DTF Gang Sheet Builder - Sam's DTF Transfers"},{"id":"gid://shopify/Product/7714123350171","title":"Upload Pre-made DTF Gang Sheet","handle":"dtf-gang-sheets-upload-ready","currencyCode":"USD","amountMax":"595.2","amountMin":"5.93","price":"5.93","compareAtPrice":"7.03","imagesUrl":"https://cdn.shopify.com/s/files/1/0314/2375/8471/files/Upload-Your-Gang-Sheet-DTF-Transfers-in-Texas-Dallas.webp?v=1744491750&width=600","additionalImages":["https://cdn.shopify.com/s/files/1/0314/2375/8471/files/Print_Upload_Your_DTF_Gang_Sheet_in_Texas.png?v=1744491752&width=600","https://cdn.shopify.com/s/files/1/0314/2375/8471/files/Print-Ready-to-Transfers-DTF-Gang-Sheet-12-x-22-Inches.webp?v=1744491754&width=600","https://cdn.shopify.com/s/files/1/0314/2375/8471/files/Print-Ready-to-Transfers-DTF-Gang-Sheet-120-x-22-Inches.webp?v=1744491756&width=600","https://cdn.shopify.com/s/files/1/0314/2375/8471/files/Print-Ready-to-Transfers-DTF-Gang-Sheet-1200-x-22-Inches.webp?v=1744491758&width=600","https://cdn.shopify.com/s/files/1/0314/2375/8471/files/Print-Ready-to-Transfers-DTF-Gang-Sheet-144-x-22-Inches.webp?v=1744491760&width=600","https://cdn.shopify.com/s/files/1/0314/2375/8471/files/Print-Ready-to-Transfers-DTF-Gang-Sheet-180-x-22-Inches.webp?v=1744491762&width=600","https://cdn.shopify.com/s/files/1/0314/2375/8471/files/Print-Ready-to-Transfers-DTF-Gang-Sheet-204-x-22-Inches.webp?v=1744491764&width=600","https://cdn.shopify.com/s/files/1/0314/2375/8471/files/Print-Ready-to-Transfers-DTF-Gang-Sheet-24-x-22-Inches.webp?v=1744491766&width=600","https://cdn.shopify.com/s/files/1/0314/2375/8471/files/Print-Ready-to-Transfers-DTF-Gang-Sheet-240-x-22-Inches.webp?v=1744491768&width=600"],"urlStore":"/products/dtf-gang-sheets-upload-ready","altImage":"Upload Pre-made DTF Gang Sheet - Sam's DTF Transfers"}],"typeSearch":"product","device":"desktop","decimalsPrice":2,"aspectRatio":"1 / 1","isAutoPlay":false,"isNavigation":false,"isPriceDisplay":false,"rowDynamic":"mot","activeDecimals":false,"hidden":false,"locked":false,"positionPrice":false,"currencyCodeCustom":"$","cssContent":"","isRemoveBranding":true,"componentId":"undefined","activeDynamicProd":true,"blockName":"Product"}
These options help businesses and apparel brands. Schools, sports teams, and creators use them. They produce custom apparel easily. No need to manage printers, inks, films, or powders.
Frequently Asked Questions
What is the best temperature for DTF transfers?
Most DTF transfers are applied between 290°F and 310°F, depending on the manufacturer.
Can I apply DTF transfers with a household iron?
Yes, but a heat press generally provides better consistency and durability.
Should DTF transfers be hot peel or cold peel?
It depends on the transfer type. Always follow the supplier's instructions.
How long should I wait before washing a DTF shirt?
Wait at least 24 hours before the first wash.
Can DTF transfers be applied to polyester?
Yes. DTF transfers work well on cotton, polyester, cotton blends, and many performance fabrics.
Why is my DTF transfer peeling?
Peeling is usually caused by incorrect temperature, pressure, moisture, or improper peel timing.
Final Thoughts
Mastering DTF transfer application is not difficult, but consistency matters. Proper garment preparation, accurate placement, correct heat press settings, and good post-press care all contribute to better results.
By following these DTF transfer application best practices, you can achieve vibrant, durable, and professional-looking prints. Get professional-looking results. Avoid many common beginner issues. Are you pressing one shirt or hundreds? A reliable process is key. It ensures consistent results every time.
I ordered some custom UV DTF stickers for a couple of Yeti cups. They came out really nice, the colors were vibrant and the suggested sizing was spot on. I am VERY happy with my order!


0 comments