If you're into DIY projects and love customizing your stuff, print to iron on transfers are a must-try. They're a fun and easy way to add personal designs to things like t-shirts, tote bags, and more. This guide will walk you through everything you need to know to get started, from choosing the right materials to troubleshooting common issues.
Key Takeaways
- Print to iron on transfers let you add custom designs to fabric easily.
- Choosing the right transfer paper and fabric is crucial for good results.
- Proper ironing techniques can make or break your project.
- Avoid common mistakes like incorrect temperature settings and improper pressure.
- Taking care of your finished product ensures it lasts longer.
Understanding Print to Iron On Transfers
What Are Print to Iron On Transfers?
Print to iron on transfers are special designs that you can print and then transfer onto fabric using heat. These transfers are perfect for creating custom apparel, tote bags, and other fabric items. Custom DTF Transfers are a popular choice because they offer vibrant colors and durability.
Types of Print to Iron On Transfers
There are several types of print to iron on transfers, including:
-
Heat press DTF Transfers: These are applied using a heat press machine for a professional finish.
-
Iron on DTF Transfers: These can be applied using a regular household iron.
-
Custom Size DTF Transfers: These allow you to print designs in various sizes to fit your project needs.
Benefits of Using Print to Iron On Transfers
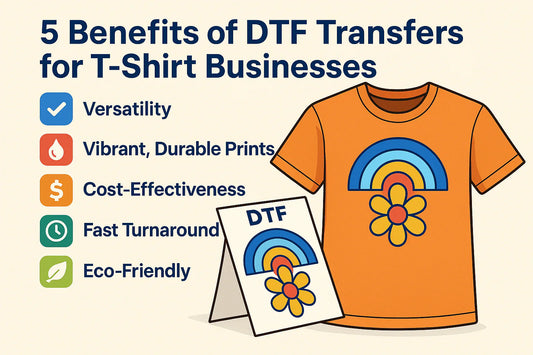
Using print to iron on transfers offers several benefits:
-
Custom Apparel printing: Easily create personalized clothing items.
-
Same-day printing and shipping: Get your designs printed and shipped quickly.
-
Durability: These transfers are designed to last through many washes.
If you are looking for a DTF Transfer near to you in Texas, Sam's DTF Transfers is the best choice for you.
Don't forget to use our Gang Sheet Builder to maximize your print space and save on costs. Explore the bold usa dtf transfer product at Sam's DTF Transfers for more options.
Choosing the Right Materials for Your Project

Selecting the Best Transfer Paper
When it comes to Custom DTF Transfer Printing, choosing the right transfer paper is crucial. Not all transfer papers are created equal, and the type you select can significantly impact your project's outcome. Consider the fabric you're using and the look you want to achieve. For instance, some papers work better on light fabrics, while others are designed for dark materials. If you're unsure, it's always a good idea to test a small piece first.
Picking the Right Fabric
The fabric you choose plays a vital role in the success of your iron-on transfer. Cotton and polyester blends are generally the best options. They provide a smooth surface that allows the transfer to adhere properly. Avoid fabrics with a lot of texture or stretch, as these can cause issues with the transfer process.
Essential Tools and Equipment
To get the best results, you'll need a few essential tools and equipment:
-
Heat Press or Iron: A heat press is ideal for consistent results, but a household iron can work for smaller projects.
-
Scissors or Cutting Machine: For cutting out your designs from the transfer paper.
-
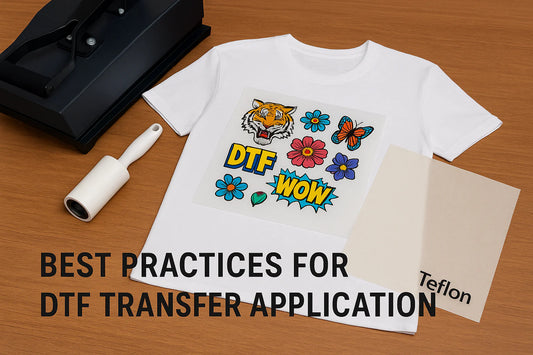
Teflon Sheet or Parchment Paper: To protect your design and fabric during the transfer process.
If you are looking for a DTF Transfer near to you in Texas, Sam's DTF Transfers is the best choice for you. Don't forget to use our Gang Sheet Builder to make the most out of your transfer paper and create multiple designs at once.
Choosing the right materials is the first step to a successful DIY project. Make sure to consider all factors, from the type of transfer paper to the fabric and tools you'll be using.
Step-by-Step Guide to Applying Print to Iron On Transfers
Preparing Your Design
Start with a high-quality design. Use high-resolution images and ensure you mirror your design before printing. This is crucial for Custom DTF Transfer Printing. If you are looking for a DTF Transfer near to you in Texas, Sam's DTF Transfers is the best choice for you.
Cutting and Positioning the Transfer
Carefully cut your design from the DTF Gang Sheet. Position the transfer on your fabric, making sure it's centered. Use a ruler if needed for precise placement.
Ironing Techniques and Tips
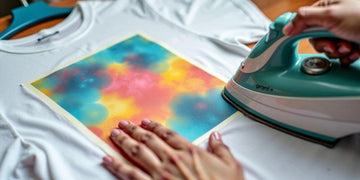
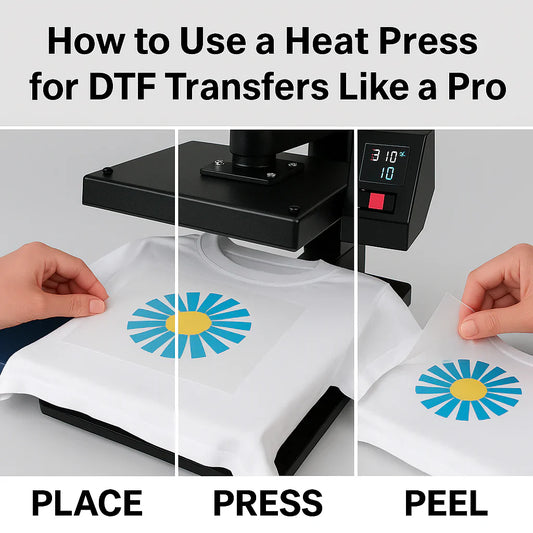
Set your heat press to 325°F for 15 seconds with medium pressure. Pre-press your garment for 10 seconds to remove moisture and wrinkles. Place the DTF transfer on the garment and press for 15 seconds. Peel the film back while it's still warm. For best results, do a post-press for 10 more seconds.
Remember to follow the manufacturer's instructions for peeling your DTF print. Sometimes you may need to peel it cold.
For more efficient printing, use our Gang Sheet Builder to maximize your print space. This tool helps you arrange multiple designs on a single sheet, saving you time and effort.
Common Mistakes and How to Avoid Them
When working with custom DTF transfer printing, it's easy to make mistakes that can ruin your project. Here are some common issues and how to avoid them.
Incorrect Temperature Settings
One of the most frequent mistakes is using the wrong temperature. Always follow the recommended settings for your transfer paper and fabric. Too high or too low temperatures can cause the transfer to not adhere properly or even damage the fabric.
Improper Pressure Application
Applying the right amount of pressure is crucial. If the pressure is too light, the transfer won't stick well. If it's too heavy, you might end up with a distorted design. Use a heat press machine for consistent results.
Peeling Issues
Peeling the transfer at the wrong time can lead to incomplete or damaged designs. Some transfers need to be peeled hot, while others should be peeled cold. Always check the instructions for your specific transfer type.
If you are looking for a DTF Transfer near to you in Texas, Sam's DTF Transfers is the best choice for you.
For more tips and to create your own designs, use our Gang Sheet Builder. Explore custom DTF transfers for Halloween with the autumn essentials - ivory edition. Perfect for creating unique designs, this product offers a range of options for your seasonal needs. Visit our design library for inspiration and support for your DTF printing projects.
Caring for Your Finished Product
Washing and Drying Guidelines
To keep your custom DTF transfer looking fresh, always turn the garment inside out before washing. This helps protect the design from rubbing against other clothes. Use a gentle cycle with cold water and avoid bleach, as it can cause the image to fade. Most fabrics can withstand up to 20 washes without significant wear. For drying, tumble dry on low heat or hang dry to prevent any damage.
Storage Tips
Proper storage is key to maintaining the quality of your DTF transfers. Store your finished products in a cool, dry place away from direct sunlight. If you need to fold them, place a piece of tissue paper between the folds to avoid creases on the design. This ensures that there is No peeling, No Wrinkle on your transfers.
Maintaining Transfer Quality Over Time
To keep your transfers looking vibrant, avoid ironing directly on the design. If ironing is necessary, place a cloth over the transfer. Regularly check for any signs of wear and address them promptly. If you notice any peeling, consider reapplying heat to the affected area. For the best results, use our Gang Sheet Builder to create high-quality designs that last.
If you are looking for a DTF Transfer near to you in Texas, Sam's DTF Transfers is the best choice for you. Explore the [boat waves sun rays lake days DTF transfer](https://samsdtftransfers.com/products/boat-waves-sun-rays-lake-days-dtf-transfer) at Sam's DTF Transfers in Texas. This product is part of a diverse range of DTF transfers, including custom designs and seasonal bundles. Visit our design library for unique options and support resources.
Advanced Techniques for Professional Results
Using a Heat Press Machine
For high-quality DTF transfers, using a heat press machine is essential. It ensures even heat and pressure, which are crucial for a successful transfer. Make sure to follow the manufacturer's instructions for temperature and time settings.
Layering Multiple Transfers
Layering multiple transfers can add depth and complexity to your designs. Start by applying the base layer and then add subsequent layers, ensuring each one is properly aligned and pressed. This technique is great for creating multi-colored or textured designs.
Customizing with Additional Elements
Enhance your DTF transfers by adding extra elements like glitter, foil, or rhinestones. These additions can make your designs stand out and give them a unique touch. Be sure to test these elements on a sample fabric to ensure compatibility.
If you are looking for a DTF Transfer near to you in Texas, Sam's DTF Transfers is the best choice for you.
For those interested in custom DTF transfer printing, our Gang Sheet Builder is a fantastic tool. It allows you to maximize your print space and save on costs by printing multiple designs on a single sheet. Give it a try and see how it can streamline your projects.
In this tutorial, we'll walk you through the DTF transfer process, from preparing the artwork to applying the design onto the fabric.
Troubleshooting Print to Iron On Transfer Issues

Fixing Transfer Peeling
One common issue with Custom DTF Transfer Printing is transfer peeling. This can happen if the temperature or pressure settings are incorrect. Make sure to follow the manufacturer's instructions for the best results. If the transfer still peels, consider using a heat press machine for more consistent results.
Addressing Color Fading
Color fading can be a major problem, especially after washing. To avoid this, always wait at least 24 hours before washing a freshly pressed garment. Turn the garment inside out and use a gentle cycle. If you notice fading, it might be due to the quality of the inks or transfer paper used. For high-quality results, use our Gang Sheet Builder to create your designs.
Handling Transfer Misalignment
Misalignment can ruin your design. To prevent this, make sure your garment is flat and secure before applying the transfer. Use a ruler or a T-shirt alignment tool for precision. If you are looking for a DTF Transfer near to you in Texas, Sam's DTF Transfers is the best choice for you.
For more tips and tools, explore our website and make the most out of your DIY projects.
Conclusion
In conclusion, print to iron-on transfers offer a fantastic way to personalize your DIY projects. Whether you're making custom t-shirts, tote bags, or other fabric items, the process is straightforward and the results can be impressive. By following the steps outlined in this guide, you can achieve professional-looking designs right at home. Remember to choose the right materials, follow the instructions carefully, and take your time to ensure the best results. Happy crafting!
Frequently Asked Questions
What are print to iron on transfers?
Print to iron on transfers are special designs you can print and then transfer onto fabrics like t-shirts, tote bags, and more using heat.
What types of transfer paper should I use?
There are different types of transfer paper for light and dark fabrics. Make sure to choose the right one for your project to get the best results.
Can I use a regular home iron for transfers?
Yes, you can use a home iron, but make sure to follow the instructions carefully. Even pressure and the right temperature are key.
Why is my transfer peeling off?
Peeling can happen if the temperature is too low or if you didn't apply enough pressure. Make sure to follow the guidelines for heat and pressure.
How do I wash clothes with iron on transfers?
Turn the clothes inside out and wash them in cold water. Avoid using bleach and try to air dry them to make the transfer last longer.
Can I layer multiple transfers on one item?
Yes, you can layer multiple transfers, but make sure each layer is properly applied before adding the next one for the best results.




0 comments