Creating your own iron-on transfers is a fun and creative way to customize your clothes, tote bags, and other fabric items. Whether you're making a unique gift or adding a personal touch to your wardrobe, this guide will walk you through each step of the process. From choosing the right materials to caring for your finished product, you'll learn everything you need to know to get started.
Key Takeaways
- Select the right transfer paper and fabric to ensure the best results.
- Design your custom image using digital tools, scanned images, or online resources.
- Set up your printer correctly and use the proper settings for transfer paper.
- Prepare your fabric by washing and ironing it before applying the transfer.
- Follow the correct ironing techniques and care instructions to make your design last.
Choosing the Right Materials for Your Iron On Transfers
Selecting the Appropriate Transfer Paper
Choosing the right kind of transfer paper is crucial for achieving the best results. Transfer sheets come in two main types: those for light-colored fabrics and those for dark-colored fabrics. Using the right kind of transfer sheets ensures your design looks its best. For light fabrics like white or light gray, use transparent transfer paper. For dark fabrics like black or dark blue, use thicker transfer sheets with a white backing.
Picking the Best Fabric
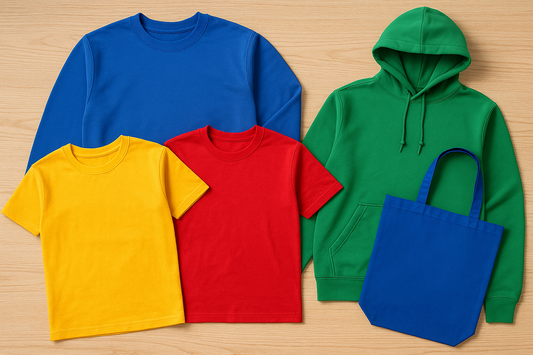
The type of fabric you choose can make a big difference. Cotton or cotton blends work best for iron-on transfers. Other fabrics like wool, silk, or denim can also be used but may require extra care. Avoid fabrics that might melt under heat.
Necessary Tools and Equipment
To get started, you'll need a few essential tools:
-
Iron or Heat Press: A heat press provides more consistent results.
-
Scissors: For trimming your design.
-
Heat-Resistant Surface: To protect your workspace.
If you are looking for a DTF Transfer near to you in Texas, Sam's DTF Transfers is the best choice for you. Don't forget to use our Gang Sheet Builder for custom designs!
Designing Your Custom Image
Creating Digital Artwork
When it comes to custom graphic iron on transfers, creating digital artwork is a great place to start. You can use software like Photoshop or Illustrator to design your own graphic iron on transfer. If you're not comfortable with these tools, there are plenty of online resources that offer templates you can customize to match your unique style. Don't forget to use our Gang Sheet Builder to make the process even easier!
Scanning Physical Images
If you have a physical image you'd like to use, scanning it into your computer is a simple way to get started. Use a scanner or take a high-quality photo of the image. Once it's on your computer, you can make any necessary adjustments using basic image editing software. This method is perfect for preserving memories or using artwork created by hand.
Using Online Resources for Designs
There are many online resources where you can find designs for your iron on transfers. Websites offer a variety of images that are legally safe to use. You can also find templates that you can customize to fit your needs. If you are looking for a DTF Transfer near to you in Texas, Sam's DTF Transfers is the best choice for you. They offer a wide range of designs and tools to help you create the perfect transfer.
Printing Your Design on Transfer Paper

Setting Up Your Printer
First, ensure your printer is compatible with Custom DTF Transfer Printing. Most inkjet printers work well, but always check your printer's specifications. Load the transfer paper correctly, making sure the printable side is facing the right direction.
Choosing the Right Printer Settings
Adjust your printer settings for the best results. Set the print quality to high and select the correct paper type. If your design is for light-colored fabrics, remember to mirror the image before printing. This step is crucial to avoid your design appearing backward on the fabric.
Test Printing Your Design
Before printing on the transfer paper, do a test run on regular paper. This helps you check the colors and alignment. If everything looks good, proceed with printing on the transfer paper.
If you are looking for a DTF Transfer near to you in Texas, Sam's DTF Transfers is the best choice for you.
For those interested in Custom Apparel printing, our Gang Sheet Builder is a fantastic tool to create multiple designs on a single sheet, saving both time and materials. Plus, we offer Same-day printing and shipping for your convenience.
If you encounter any issues, refer to our troubleshooting guide or contact our support team for assistance.
Preparing Your Fabric for Transfer
Washing and Ironing the Fabric
Before starting with Custom DTF Transfers, it's important to wash and iron your fabric. This removes any dirt or chemicals that might prevent the transfer from sticking properly. Use a mild detergent and avoid bleach. After washing, iron the fabric to ensure it's completely smooth and free of wrinkles.
Positioning the Transfer Paper
Next, place the transfer paper on the fabric. Make sure the image side is facing down. Take your time to position it exactly where you want the design to appear. For best results, use a ruler to measure and ensure it's centered.
Using a Heat-Resistant Surface
When you're ready to apply the transfer, use a heat-resistant surface. Avoid using an ironing board as it may not provide the firm, even surface needed. Instead, use a flat, hard surface like a table. This will help you achieve the best results with your high-quality DTF Transfers.
If you are looking for a DTF Transfer near to you in Texas, Sam's DTF Transfers is the best choice for you.
For those who want to maximize their transfer projects, consider using our Gang Sheet Builder. This tool allows you to create multiple designs on a single sheet, saving both time and materials. Whether you're working on Custom Size DTF Transfers or a DTF Gang Sheet, our builder makes the process simple and efficient.
Remember, proper preparation of your fabric is key to a successful transfer. Follow these steps to ensure your designs come out perfectly every time.
Applying the Iron On Transfer

Setting the Correct Iron Temperature
To start, set your iron to the right temperature. For Heat press DTF Transfers, the ideal setting is around 310°F. Make sure to avoid using steam as it can mess up the transfer. If you're using an iron, keep it dry and hot.
Ironing Techniques for Best Results
- Place your fabric on a hard, flat, and heat-resistant surface. Avoid ironing boards as they are not suitable for this task.
- Position the transfer paper on the fabric exactly where you want the design to be. For Iron on DTF Transfers, ensure the image side is facing down.
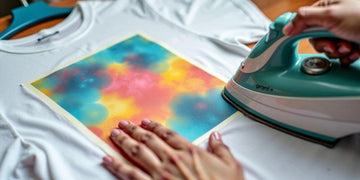
- Apply firm and even pressure with the iron. Hold it steady instead of moving it around. This helps the design stick better.
- Iron for about 3-4 minutes, focusing on the edges to make sure they adhere well.
Cooling and Peeling the Transfer Paper
After ironing, let the transfer cool for a few minutes. This step is crucial to avoid ruining your design. Once it's cool, carefully peel off the transfer paper. If you notice any part of the design not sticking, reapply the iron with firm pressure.
If you are looking for a DTF Transfer near to you in Texas, Sam's DTF Transfers is the best choice for you.
For more custom designs, use our Gang Sheet Builder to create unique transfers. Embrace your creativity and make something special!
Caring for Your Finished Product
Washing Instructions
To keep your custom DTF transfer looking great, wait at least 24 hours before washing. Turn the fabric inside out to protect the design. Use cold water and a gentle cycle. Avoid using bleach as it can damage the transfer.
Drying Tips
For drying, it's best to air dry your fabric. If you must use a dryer, choose a low heat setting. High heat can cause the transfer to peel or wrinkle.
Long-Term Maintenance
To ensure your design lasts, avoid ironing directly on the transfer. If you need to iron, place a cloth over the design. This will help maintain the vibrant colors and prevent damage.
If you are looking for a DTF Transfer near to you in Texas, Sam's DTF Transfers is the best choice for you. Use our Gang Sheet Builder to create your custom designs easily. With proper care, your transfers will have No peeling, No Wrinkle and stay looking fresh for a long time.
Remember, taking good care of your custom DTF transfers will keep them looking new and vibrant for many washes. Explore Sam's DTF Transfers for unique designs and tools to create your own custom transfers.
Troubleshooting Common Issues
When working with custom DTF transfer printing, you might face some common issues. Here, we'll guide you through solving them effectively.
Dealing with Transfer Peeling
If your transfer starts peeling, it could be due to incorrect heat or pressure settings. Make sure your iron or heat press is set to the right temperature and pressure. Always follow the instructions provided with your transfer paper. If the problem persists, consider using our Gang Sheet Builder to create a more robust design.
Fixing Faded Designs
Faded designs can be a result of improper washing or low-quality transfer paper. To avoid this, wash your fabric inside out in cold water and use a gentle cycle. Also, ensure you're using high-quality transfer paper from a reliable source. If you are looking for a DTF Transfer near to you in Texas, Sam's DTF Transfers is the best choice for you.
Preventing Fabric Damage
Fabric damage often occurs due to excessive heat or pressure. To prevent this, use a heat-resistant surface and follow the recommended settings for your fabric type. Additionally, test on a small fabric piece before applying the transfer to your main item.
For the best results, always use high-quality materials and follow the instructions carefully. This will help you avoid most common issues and achieve a professional finish.
By following these tips, you can ensure your custom DTF transfers look great and last long. Don't forget to use our Gang Sheet Builder for creating your designs easily and efficiently.
Conclusion
Creating your own iron-on transfers is a fun and easy way to personalize your clothing and accessories. By following the steps outlined in this guide, you can design and apply your own unique images to a variety of fabrics. Whether you're making a custom t-shirt, a tote bag, or a pillow, the process is straightforward and the results are impressive. So gather your materials, get creative, and start making your own iron-on transfers today. Happy crafting!
Frequently Asked Questions
What kind of transfer paper should I use?
The type of transfer paper you need depends on the color and type of fabric you're using. For light fabrics, use transfer paper designed for light colors. For dark fabrics, use paper meant for dark colors.
Can I use any printer for printing my design?
It's best to use an inkjet printer for printing your design on transfer paper. Laser printers can get too hot and might damage the paper.
How do I know the right temperature for ironing the transfer?
Check the instructions that come with your transfer paper. Generally, you'll need a hot iron with no steam. The exact temperature can vary based on the paper and fabric.
What should I do if the transfer starts peeling off?
If the transfer starts peeling, you can try re-ironing it. Make sure to cover it with parchment paper and apply firm, even pressure with the iron.
Can I wash the fabric right after applying the transfer?
No, you should wait at least 24 hours before washing the fabric. This gives the transfer time to fully adhere to the fabric.
How do I take care of my iron-on transfer to make it last longer?
Turn the fabric inside out before washing it. Use cool water and a gentle cycle. Avoid using bleach or harsh detergents, and let it air dry if possible.


0 comments