


Sams is by far the best ever! I can call them or email them with questions or concerns and they are always very prompt at getting back to me. Their customer service is amazing and their products are fabulous!
thank you

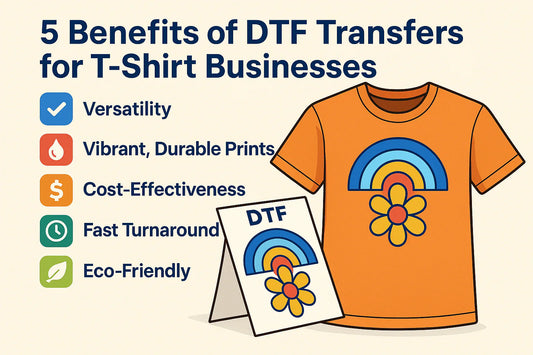
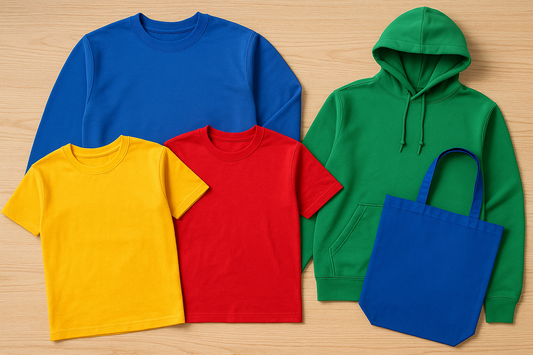
Creating your own iron-on transfers is one of the easiest ways to personalize t-shirts, hoodies, tote bags, and other fabric items. Whether you are making a one-of-a-kind gift, creating shirts for an event, or starting a small apparel business, custom iron on transfers provide an affordable way to bring your designs to life. Many creators start with iron on transfer paper at home, while others choose professionally printed custom heat transfers for better color, durability, and consistency.
Whether you are making a one-of-a-kind gift, creating shirts for an event, or starting a small custom apparel business, iron-on transfers give you a simple way to bring your designs to life.
There are a few different ways to make iron-on transfers. Some people use traditional transfer paper with a home printer, while others use professionally printed DTF transfers for brighter colors, better durability, and a cleaner finish.
In this guide, you will learn how iron-on transfers work, what materials you need, how to prepare your artwork, how to choose the right transfer size, how to apply transfers correctly, and when it may be better to order custom DTF transfers instead of printing them at home.
Iron-on transfers are designs that are applied to fabric using heat and pressure. The design is usually printed onto transfer paper or film, placed on the garment, and then pressed with a household iron or heat press.
Traditional iron-on transfer paper is popular for simple DIY projects because it can be printed at home. However, it may not always provide the same durability, stretch, or professional finish as DTF transfers.
DTF, or Direct-to-Film, transfers are printed professionally on special film using DTF inks and adhesive powder. They can be applied to many fabric types and are commonly used by apparel businesses, Etsy sellers, schools, sports teams, and custom t-shirt creators.
Both methods can help you create custom apparel, but they are not the same.
| Feature | Transfer Paper | DTF Transfers |
| Printed at home | Yes | No, professionally printed |
| Works on dark shirts | Limited | Yes |
| Color vibrancy | Moderate | High |
| Durability | Basic to moderate | Strong |
| Best for | Simple DIY projects | Professional apparel |
| Equipment needed | Inkjet printer and iron | Iron or heat press |
If you only need a quick craft project, transfer paper may be enough. If you want a more professional result, custom DTF transfers are usually the better choice. or businesses, Etsy sellers, schools, sports teams, and apparel brands, custom heat transfers often provide a more professional solution than traditional iron on transfer paper. They offer stronger durability, brighter colors, and better results on a wider variety of fabrics.
If you are printing at home, choose transfer paper based on your fabric color. Light transfer paper is made for white or light-colored fabrics. Dark transfer paper has a white backing and is designed for black, navy, or darker garments.
IIf you want stronger color, better wash durability, and less trial and error, professionally printed custom heat transfers are often the better option for heat transfers for shirts and other apparel projects.
Cotton and cotton-polyester blends are usually the easiest fabrics to work with. Polyester can also work well, but heat settings should be controlled carefully to avoid scorching or dye migration.
Avoid fabrics that are sensitive to heat unless you know the correct pressing temperature.
The quality of your final transfer depends heavily on the quality of your artwork. Even the best transfer paper or DTF transfer cannot fully fix a blurry, pixelated, or low-resolution design.
For best results, prepare your artwork with these guidelines:

If you are designing in Canva, Photoshop, Illustrator, Procreate, or another design tool, export your file at the highest quality available. For professional DTF printing, a clean PNG with a transparent background is usually one of the best options.
High-quality artwork is especially important when ordering custom iron on transfers. A clean design file allows printers to reproduce colors, details, and small text accurately.
Most online design tools and home printers use RGB colors, while professional print workflows may use CMYK or advanced color management. Because screens are backlit, colors may look slightly different when printed on fabric.
To get better results, avoid extremely dark details on dark garments, use strong contrast, and choose colors that are easy to see on your shirt color.
Transfer size can make a big difference in how professional your finished apparel looks. A design that is too small may look unfinished, while a design that is too large can feel uncomfortable or look unbalanced.
Here are general sizing guidelines:
| Placement | Common Transfer Width |
| Left Chest | 3"–4" |
| Adult Front | 10"–12" |
| Youth Front | 7"–9" |
| Full Back | 11"–14" |
| Toddler Shirt | 5"–7" |
| Hat Design | Up to 2.5" tall |
These are general recommendations. The best size may vary depending on the shirt size, design shape, and placement style.
Selecting the proper size is one of the most important parts of ordering custom shirt transfers. Even a perfectly printed design can look unprofessional if the transfer size does not match the garment.
Need help selecting the correct transfer size? Our DTF Transfer Placement Guide includes recommendations for adult shirts, youth shirts, hoodies, hats, tote bags, and more.
If you already know the exact size you need, ordering DTF transfers by size is usually the easiest option.
To apply iron-on transfers, you may need:
A household iron can work for some projects, but a heat press gives more even pressure and more consistent results.
You can create your artwork using tools like Canva, Photoshop, Illustrator, Procreate, or other design software. For best results, use high-resolution artwork with clean edges.
Before printing or ordering, zoom in and inspect the design. If it looks blurry on your screen, it will likely print blurry as well.
For businesses creating multiple designs, a gang sheet can help place several graphics on one sheet and reduce waste.
If you are using transfer paper, print your design with an inkjet printer. Always check the transfer paper instructions before printing.
For light transfer paper, you may need to mirror your design before printing. For dark transfer paper, mirroring may not be required. Always do a test print on regular paper before using your transfer sheet.
If you do not want to manage printer settings, transfer paper, cutting, or trial-and-error testing, ordering custom DTF transfers can save time and produce more consistent results.
Before applying the transfer, make sure the fabric is clean, dry, and wrinkle-free.
Pre-press or iron the garment for a few seconds to remove moisture and wrinkles. Use a lint roller to remove dust or fibers from the surface.
Place the transfer exactly where you want it. For shirts, use a ruler or placement guide to keep the design centered.
Follow the instructions for your specific transfer type. Settings may vary depending on the transfer paper, fabric, and equipment.
For DTF transfers, a common heat press range is around 290–310°F for 7–10 seconds with medium pressure. If using a household iron, apply firm pressure and avoid steam.
Basic application steps:
Internal link placement: In this section, link the phrase DTF heat press settings to your heat press settings page.
Many iron-on transfer problems start before the transfer is ever pressed. Artwork, sizing, file quality, and placement all affect the final result.
Avoid these common mistakes:
Taking a few extra minutes to check your file, size, and placement can prevent most problems.
Many issues people experience with custom iron on transfers can be traced back to artwork quality, incorrect sizing, or poor placement rather than the transfer itself.
Wait at least 24 hours before washing the garment. Turn it inside out and wash with cold water on a gentle cycle. Use mild detergent and avoid bleach or fabric softener.
Tumble dry on low heat or hang dry when possible. Do not iron directly on the design.
Proper care helps keep your transfer vibrant and long-lasting.
Peeling usually happens because of low pressure, incorrect temperature, not enough pressing time, or moisture in the fabric.
Fading can happen when using low-quality transfer paper, low-resolution artwork, or incorrect printer settings.
The surface may not have been prepared properly, or the heat and pressure may not have been strong enough.
Traditional transfer paper can feel heavier than DTF transfers, especially on larger designs.
Ordering custom DTF transfers may be the better choice if you want:
Many customers switch from iron on transfer paper to custom heat transfers because they want professional-quality results without investing in printing equipment, transfer paper testing, or repeated trial and error.
At Sam’s DTF Transfers, we print custom DTF transfers for small businesses, apparel brands, schools, sports teams, Etsy sellers, and creators across the U.S. You can order by size, upload a ready gang sheet, or build your own gang sheet online.
For many small businesses, ordering custom DTF transfers can be more affordable than purchasing transfer paper, replacing printer cartridges, testing multiple designs, and investing in equipment.
If you want professional iron-on results without printing transfers at home, Sam’s DTF Transfers makes it easy.
Order custom DTF Transfers By Size, upload your ready gang sheet, or use our Gang Sheet Builder to arrange multiple designs on one sheet.
With no minimum order requirements, no setup fees, and fast production options, you can create custom apparel without investing in expensive printing equipment.
Yes. You can make iron-on transfers at home using transfer paper, an inkjet printer, and a household iron. For more professional results, you can order custom DTF transfers and apply them yourself.
Yes, DTF transfers can be used like iron-on transfers because they are applied with heat and pressure. However, they are professionally printed and usually offer better color and durability than standard transfer paper.
Yes, a household iron can work for some DTF transfers, but a heat press is recommended for the most consistent results.
It depends on the garment and placement. Adult front designs are often around 10"–12" wide, left chest designs are usually 3"–4" wide, and full back designs are commonly 11"–14" wide.
A high-resolution PNG with a transparent background is usually a strong choice. For best results, use clean artwork at 300 DPI whenever possible.
Blurry transfers usually come from low-resolution artwork, screenshots, or images enlarged beyond their original quality.
Cotton and cotton-polyester blends are usually the best choices. DTF transfers also work on many other fabrics, including polyester and blends.
The lifespan depends on the transfer type, application method, and wash care. Professionally printed DTF transfers usually last longer than basic transfer paper when applied and washed correctly.
Use transfer paper for simple DIY projects. Use DTF transfers when you want professional quality, better durability, vibrant colors, and a cleaner finish.
No. You can use a household iron for many projects. However, a heat press provides more even pressure and generally produces more consistent, professional results.
Custom heat transfers are professionally printed designs that can be applied to garments using heat and pressure. They are commonly used for custom t-shirts, apparel brands, school events, sports teams, and promotional products.
For simple DIY projects, iron on transfer paper may be enough. For better durability, brighter colors, and professional-quality results, most businesses and apparel creators choose custom DTF heat transfers.
No comments


0 comments